

On/off - Volume button
Required tools
- Small Phillips screwdriver
- Hot glue gun (or any type of strong liquid glue)
- Small container to hold screws and other small parts removed
Instructions
1. Using a small Phillips screwdriver, unscrew all the screws on the back of the Fabli.
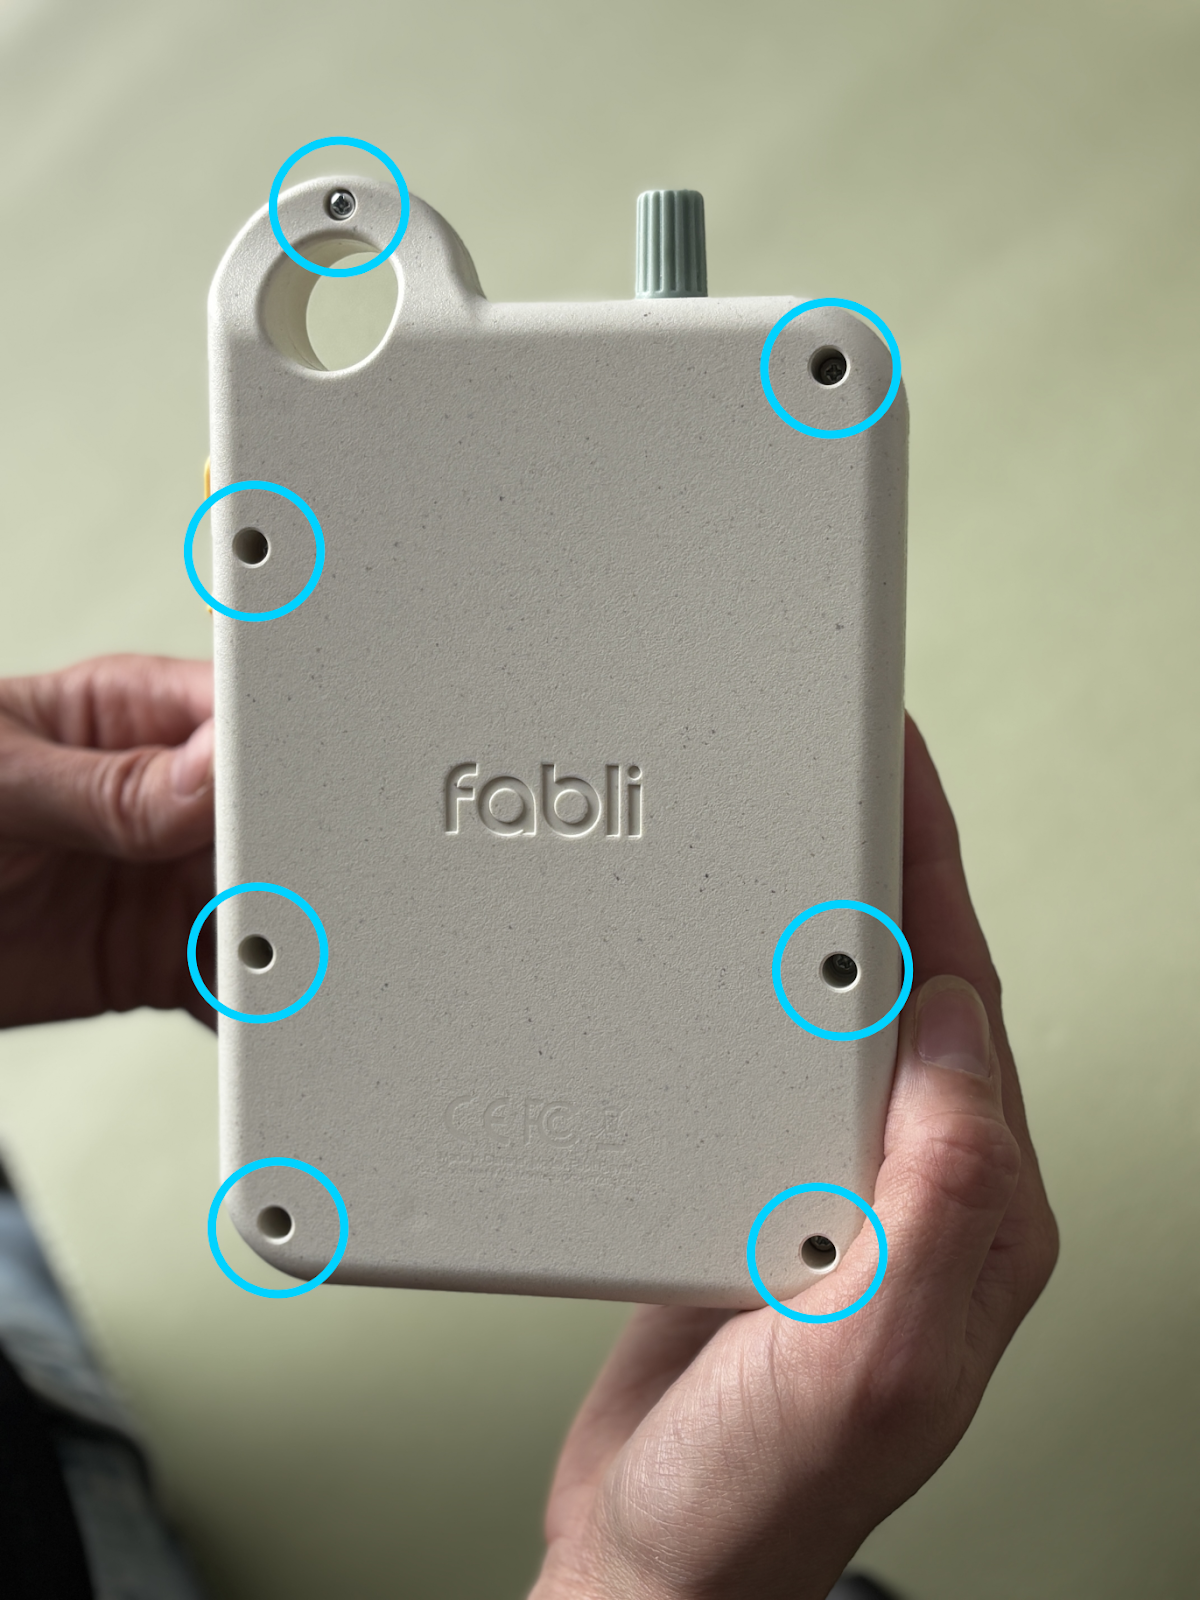
2. Place the Fabli face-down on a table (buttons facing downward) and remove the back part of the shell.
3. Remove the yellow side buttons from the Fabli.
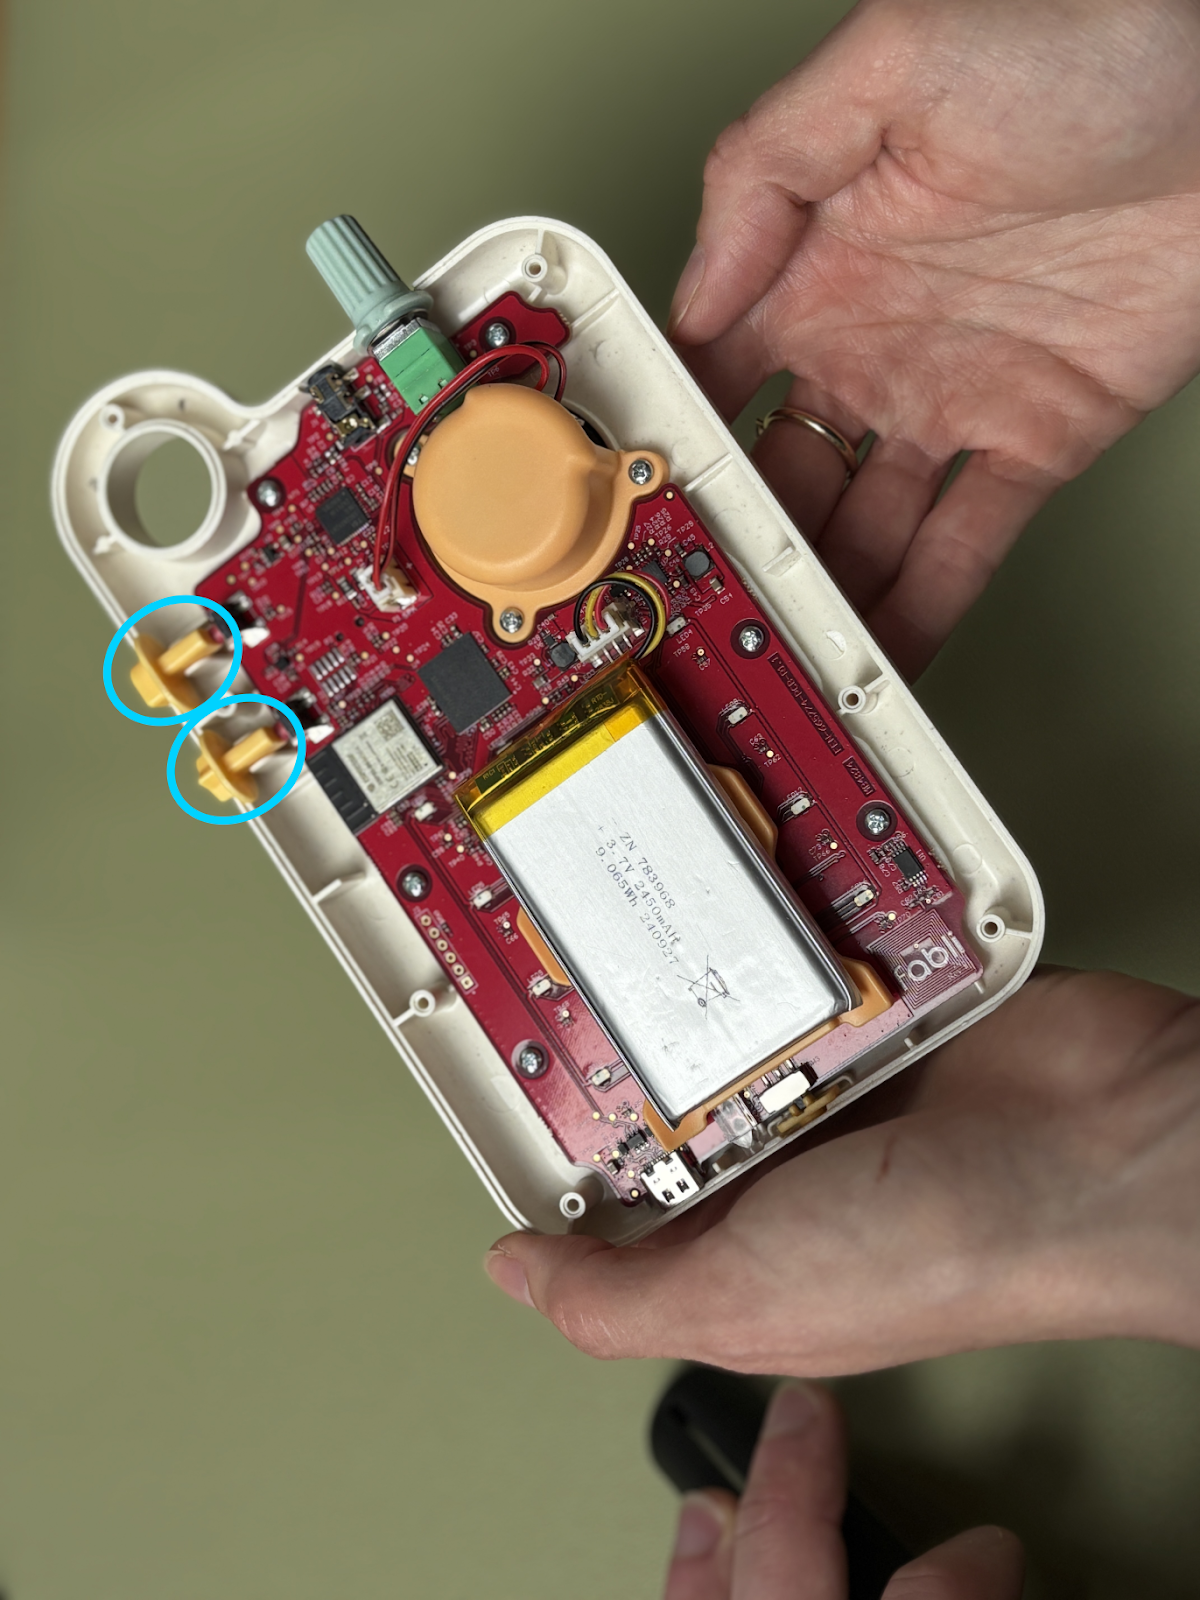
NOTE : In the following pictures, the speaker and battery are unplugged. DO NOT UNPLUG THE SPEAKER AND BATTERY. It is not necessary for this repair and risks damaging the Fabli.
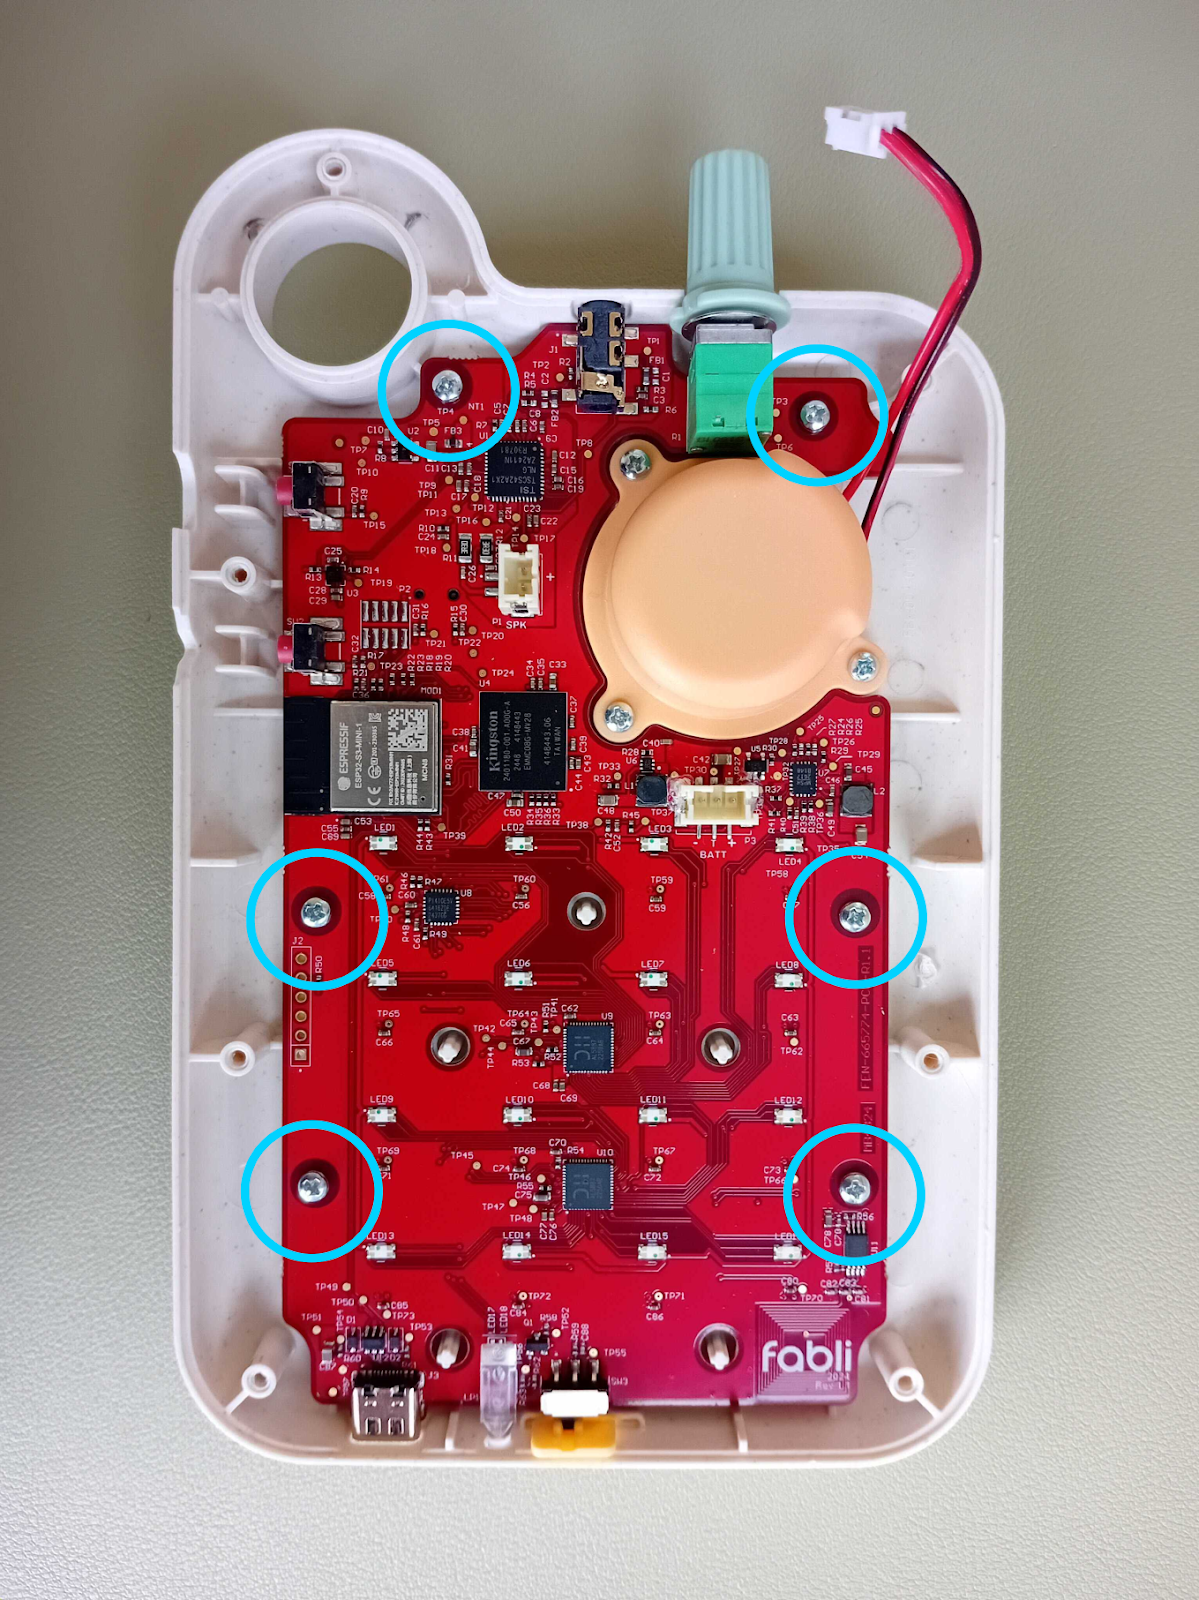
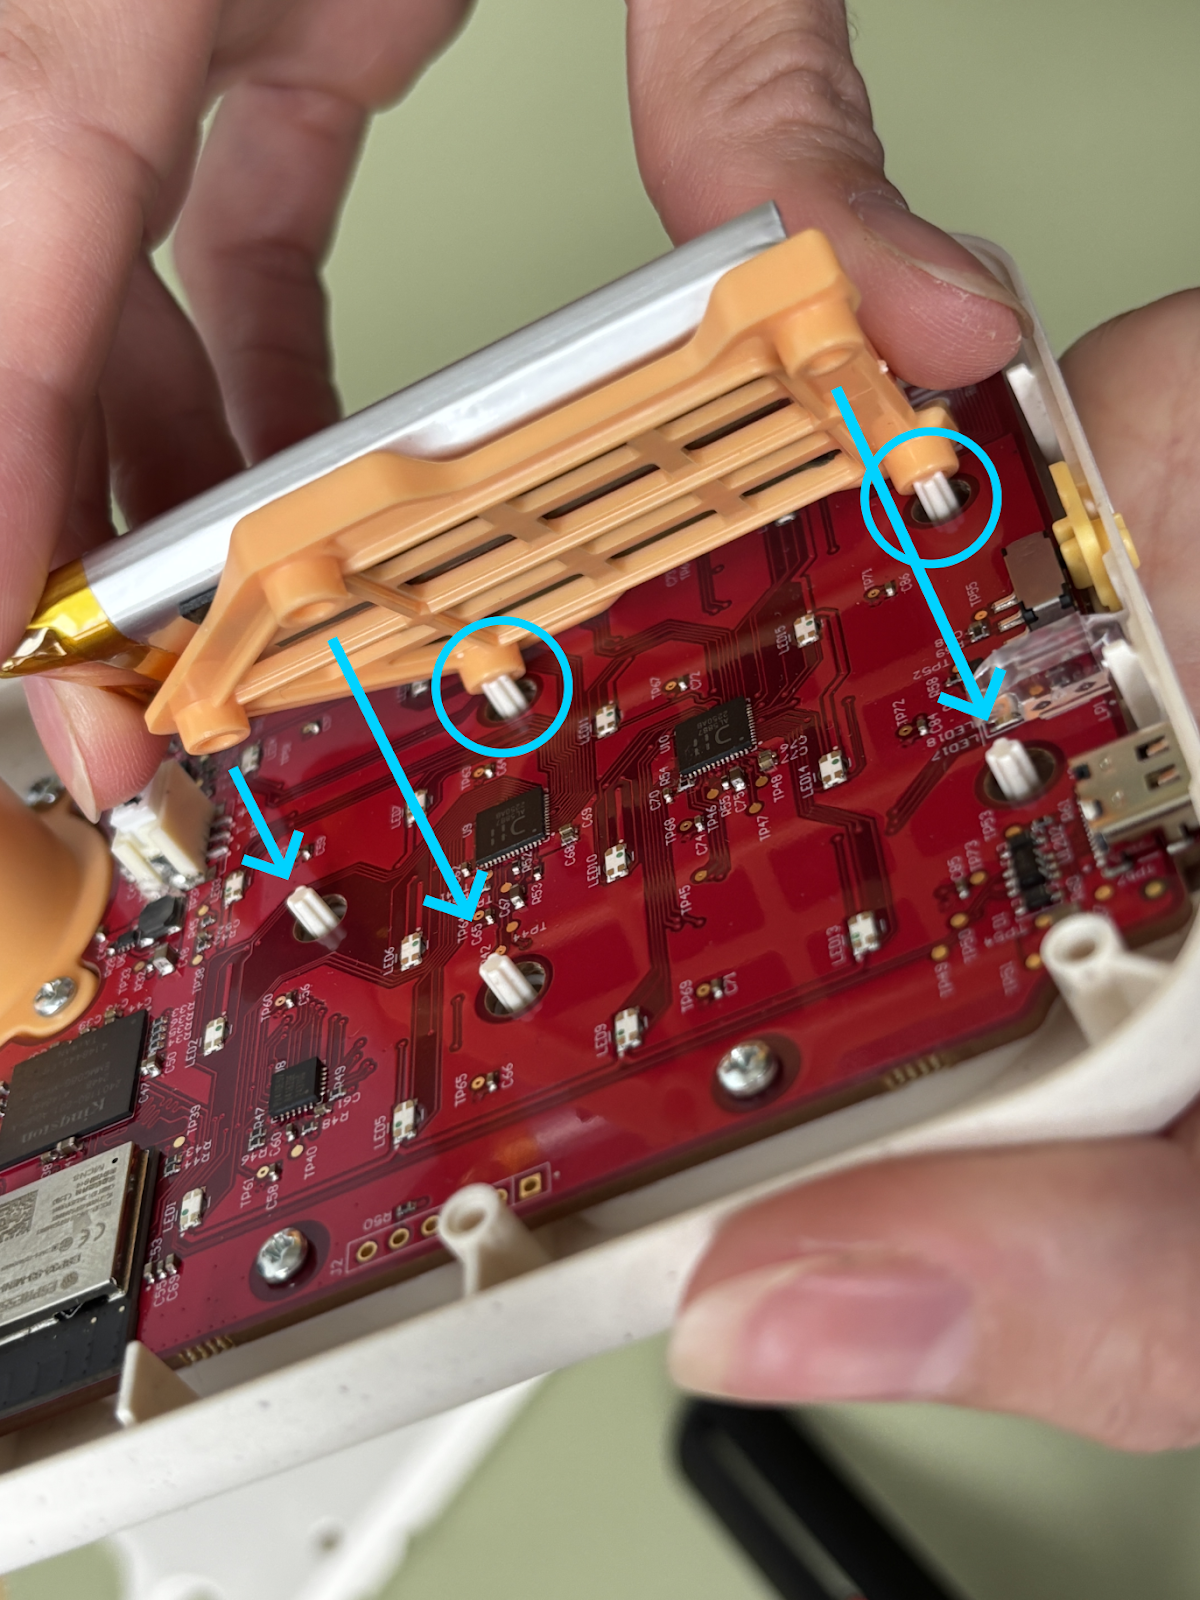
4. Unscrew the screws circled here. NOTE : it is not necessary to unscrew the ones around the speaker.
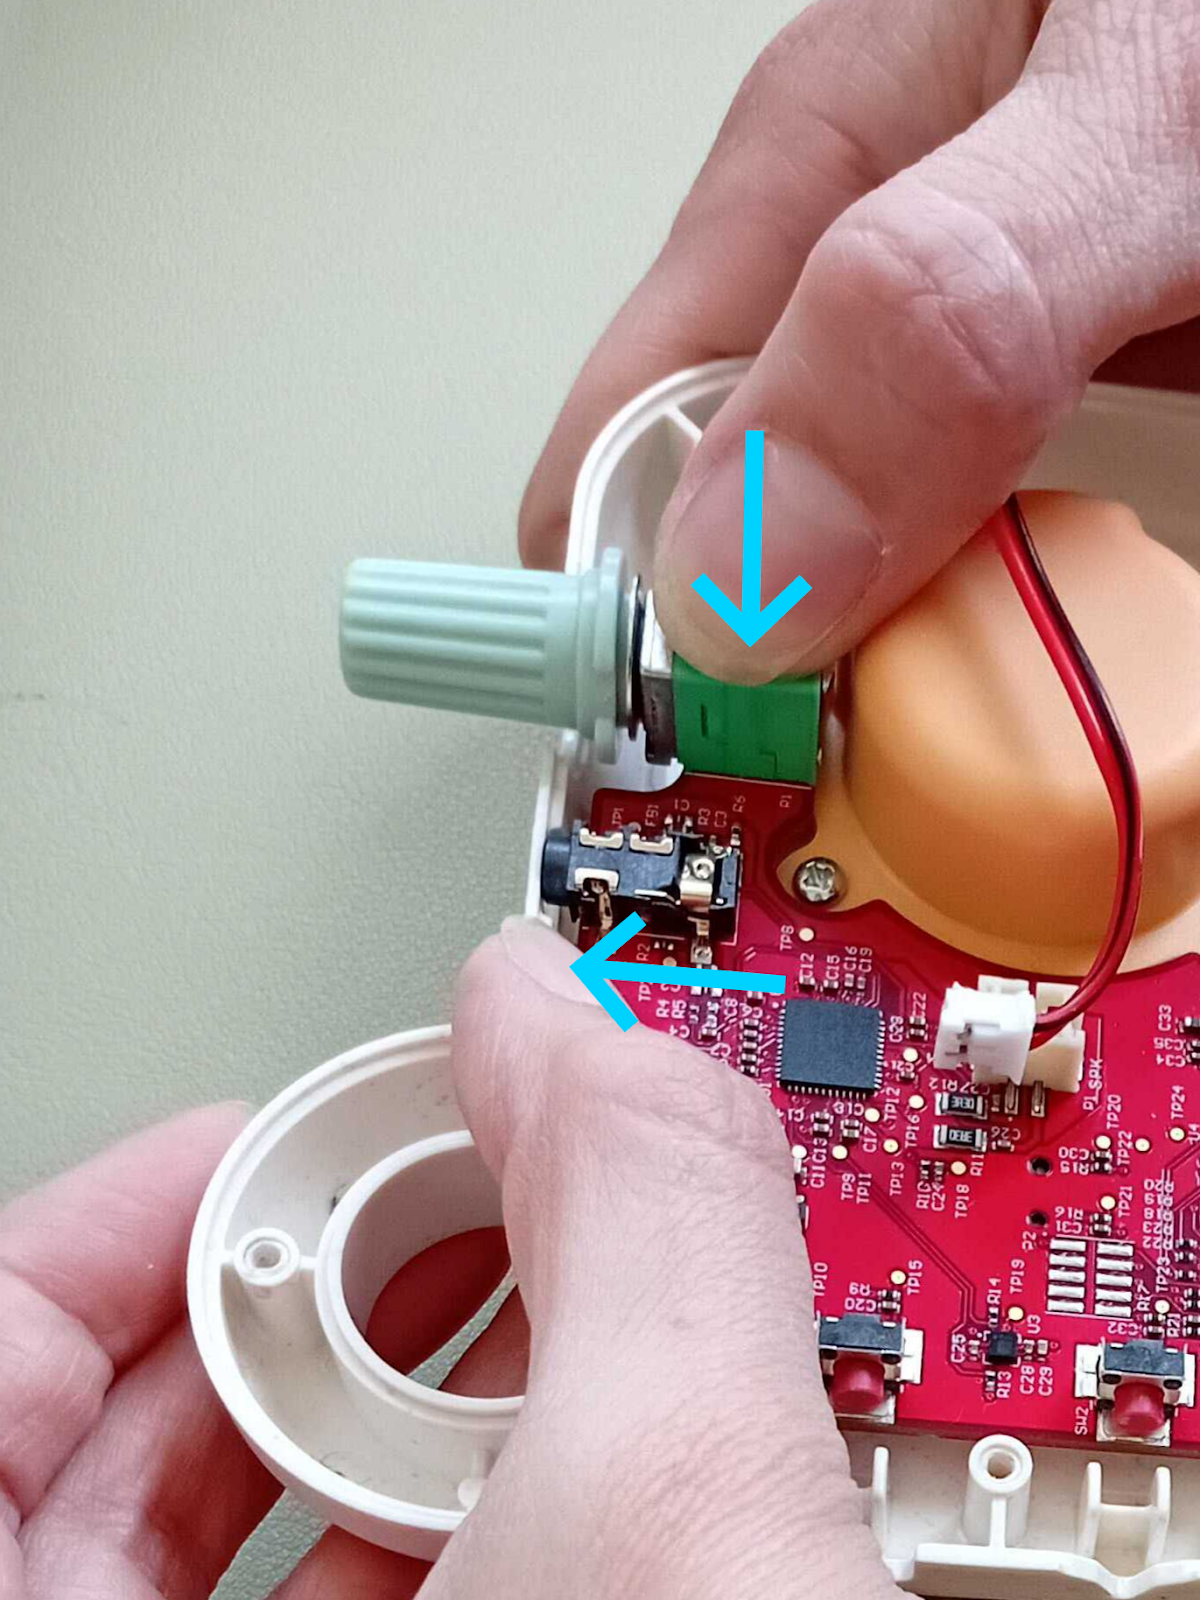
5. It is now time to slightly lift the top part of the Fabli’s circuit board from the shell.
5.1. To do this, press firmly on top of the switch with your index finger while pushing in the opposite direction on the shell's edge with your thumb.

5.2. Then, while maintaining pressure, push upward with your index finger until the audio jack (circled below) comes out of its slot and the green cap of the switch can be removed.

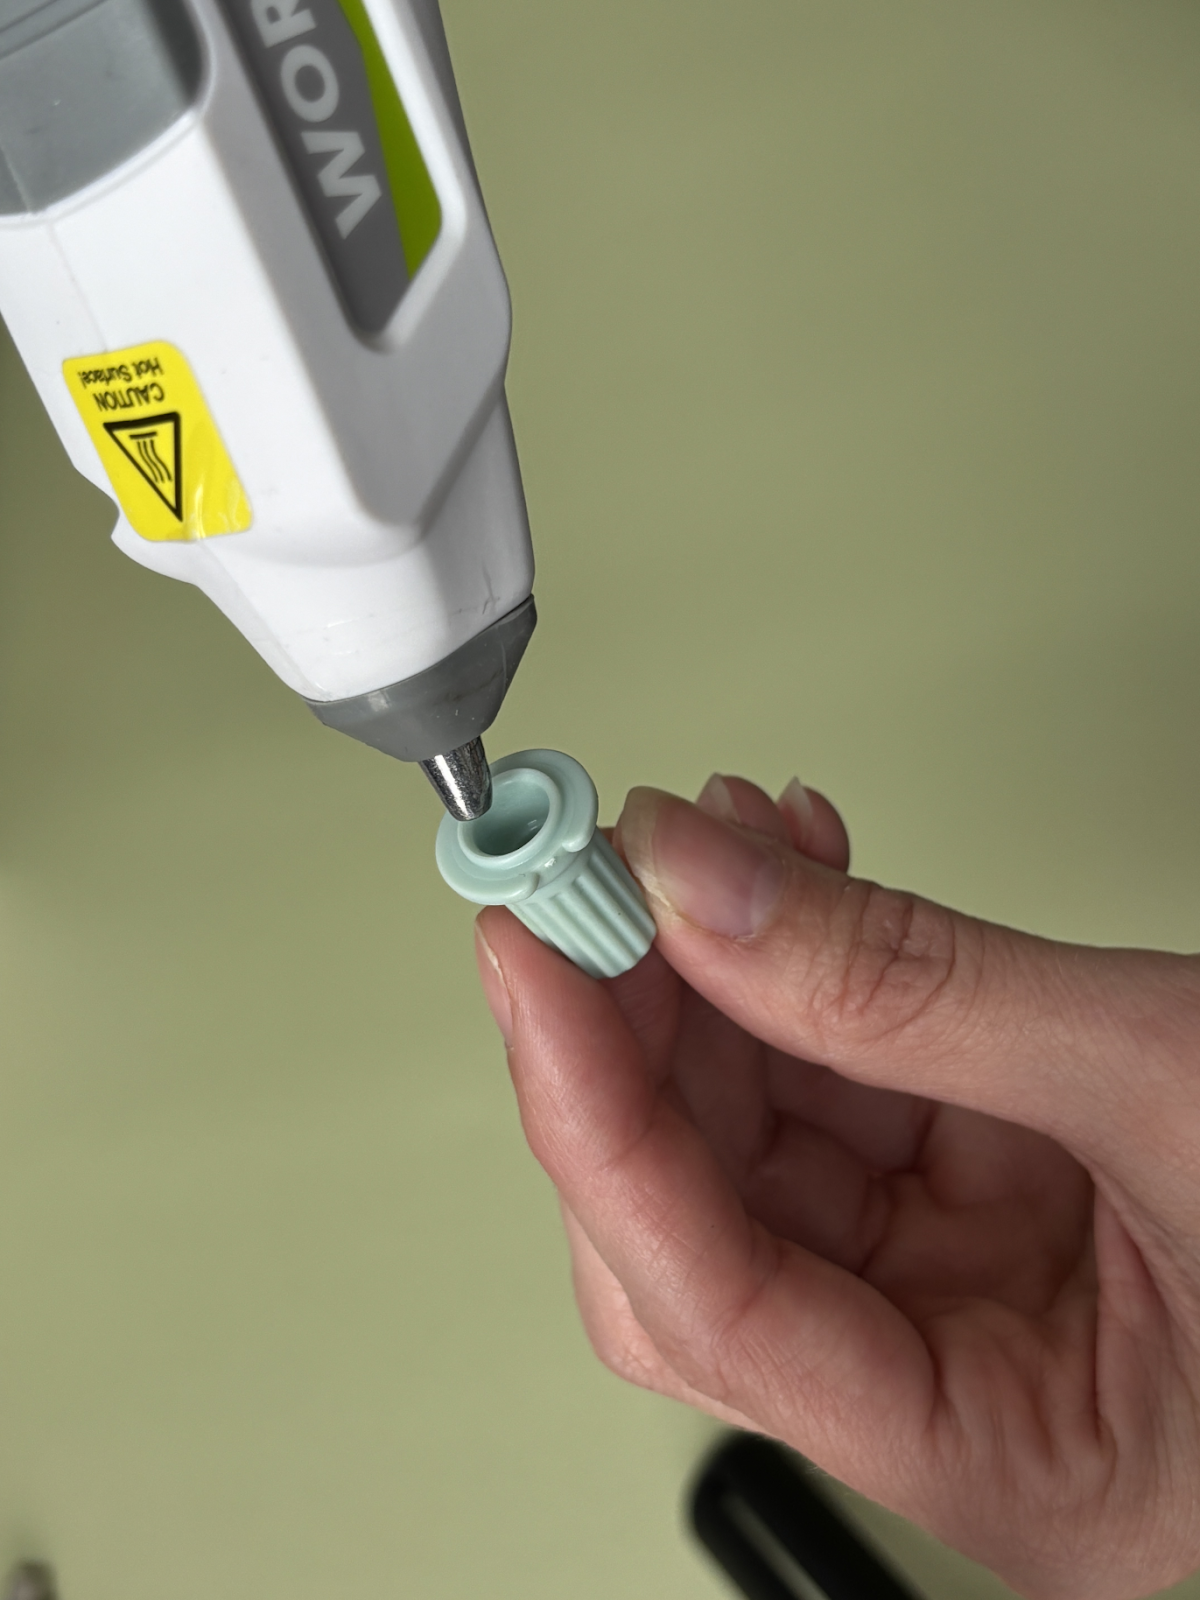
6. Put two small drops of hot glue at the bottom of the switch cap, then press it back onto the switch as far as it will go without delay. Hold it in place with light pressure for one minute, then wait at least two more minutes before proceeding to the next step.
WARNING: Do not use more than two drops of hot glue! Too much may overflow and glue the switch in place.
7. Rotate the switch and apply moderate pressure at both ends of its rotation to ensure the cap is firmly attached and the switch can still rotate freely.
8. Press on the Fabli’s shell and the base of the switch as shown to reposition the Fabli’s circuit board. It is in place when the tip of the audio jack is back in its slot (see step 5.1).
9. Screw back the 6 screws holding the circuit board. If you have both short and long screws, the circuit board uses the shorter ones.
10. Reposition the battery, aligning the support tabs with the small protrusions that go through the circuit board.
11. Put the buttons back in place as shown.


12. Time to close the shell! Make sure the top of the WiFi/Bluetooth switch fits into its slot and align the back shell with the front before closing it. The shell edges should snap together without resistance. If it doesn't close easily, reopen and check that nothing is blocking it—especially that the speaker cable runs between the switch and the speaker, not directly over it (see step 3).

13. Screw the back shell screws back in—and that's it! The repair is complete!